Today, we’re going to begin our first Survey Ship, but first…
Before We Begin
Industry
Chances are, your Military Academies have finished construction.
If they have finished, you’ll want to begin converting your CI (Conventional Industry) into the Trans-Newtonian Construction Factories as well as a few other things listed below.
If they haven’t finished, do everything seen below, just lower the percentages of both your Military Academies (click on the academies, lower the percentage, and hit modify) and the construction projects below.
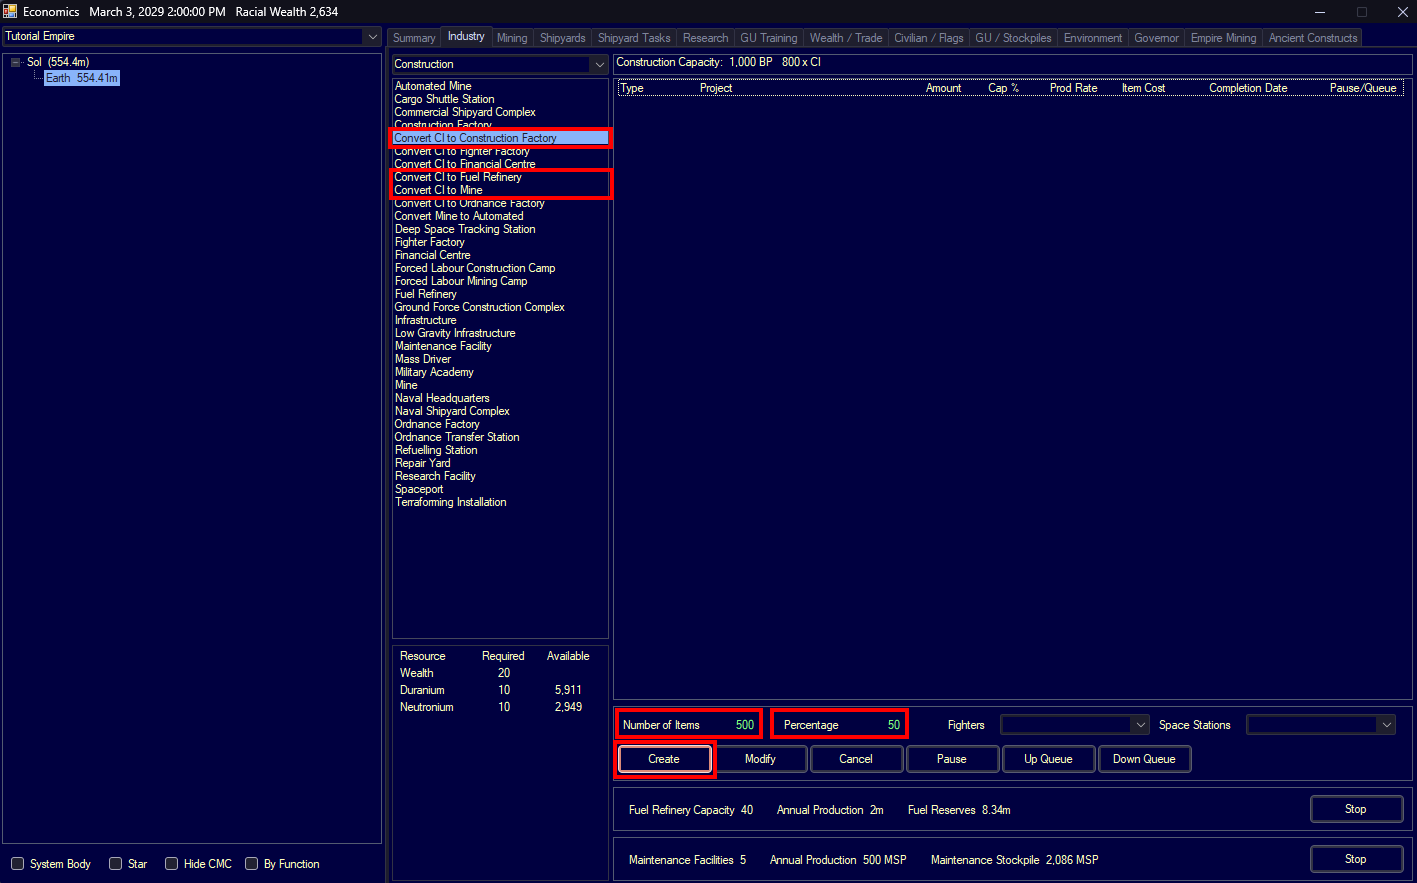
- Head over to the industry tab in the economics window.
- First, select Convert CI to Construction Factory.
- For Number of Items at the bottom, input something from 500-700. This is the amount of CI you want to use up.
- At the top of your screen you can see we have 800 x CI if you setup the game the same way I did.
- For Percentage you want to input something around 50%, you can put more or less.
- The percentage is the amount of Construction Capacity we want to allocate to this task.
- Our current Construction Capacity is 1,000 (seen at the top of the screen beside the CI).
- What we’re building right now, Construction Factories, increases our Construction Capacity, also known as BP (Build Points).
- The percentage is the amount of Construction Capacity we want to allocate to this task.
- Hit create.
- Then, repeat with the following, adjusting the percentages and amounts as needed:
- Convert CI to Fuel Refinery with 60 items at 15%.
- Fuel Refineries will begin increasing our fuel production, we have a lot of extra right now, but it’ll be used up soon.
- Convert CI to Mine with 140 items at 35%.
- Mines will increase the rate at which we extract resources.
- If you’d like to, you can also convert some of your Mines to Automated Mines (its an option right below the Covert CI stuff). We’ll be using Automated Mines for our first resource extraction on other planets/moons.
- Convert CI to Fuel Refinery with 60 items at 15%.
- If you start to encounter any resource troubles, pause your construction projects or shipyard tasks. We’ll get more resources soon.
After queuing them up your queue should look something like this.
If you haven’t, you can also queue up the research talked about at the end of the last tutorial.
Shipyards
Your shipyards have also probably completed.
You can go ahead and further increase the capacity of the C (Commercial) shipyard all the way up to 100,000 or even further using the Continual Capacity Upgrade.
For the other shipyard, I’d recommend adding a second (and maybe third) slipway, by selecting Add Slipway instead of Continual Capacity Upgrade, then pressing Set Activity.
- More slipways allow multiple ships to concurrently be constructed (or modified/scrapped) inside of the shipyard.
Once again, if you start to experience resource troubles, reduce the amount of things you’re constructing (hit Pause Activity or Delete Activity). We’re working towards getting more.
Survey Ship
Now that that’s out of the way, let’s begin our first survey ship.
Survey Ships are vital for expanding your empire. They are how we locate more resources and a whole host of other information.
Before continuing, make sure you’ve researched Geological Survey Sensors.
The first thing you’ll want to do is open up the Class Design window.
 Image of opening class design window.
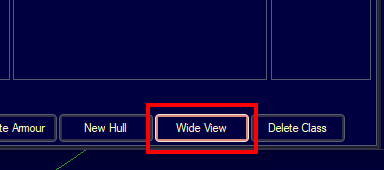
Now, ignore all the UI stuff (we’ll go through it in a minute) and hit Wide View.
Wide view makes it a bit easier to understand this UI, so I’ll be explaining with wide view in mind, although the default view is very similar.
Let’s go through the interface. You can ignore the tabs at the top for now, the only important one is the one we’re on, and Glossary to understand the abbreviations that will appear shortly.
- Here is where all your created ship classes will appear.
- This is a list of components you can put inside your ships.
- This is where the components inside the ship you are currently designing will appear.
- This displays information about the ship you are currently designing.
- Everything in area 3 also appears here, but it isn’t displayed in a neat list.
- This will display a bit of information about your currently selected component.
- These are the functions you can perform on your selected ship/component.
- Most of these won’t be used right now, I’ll explain them as we need them.
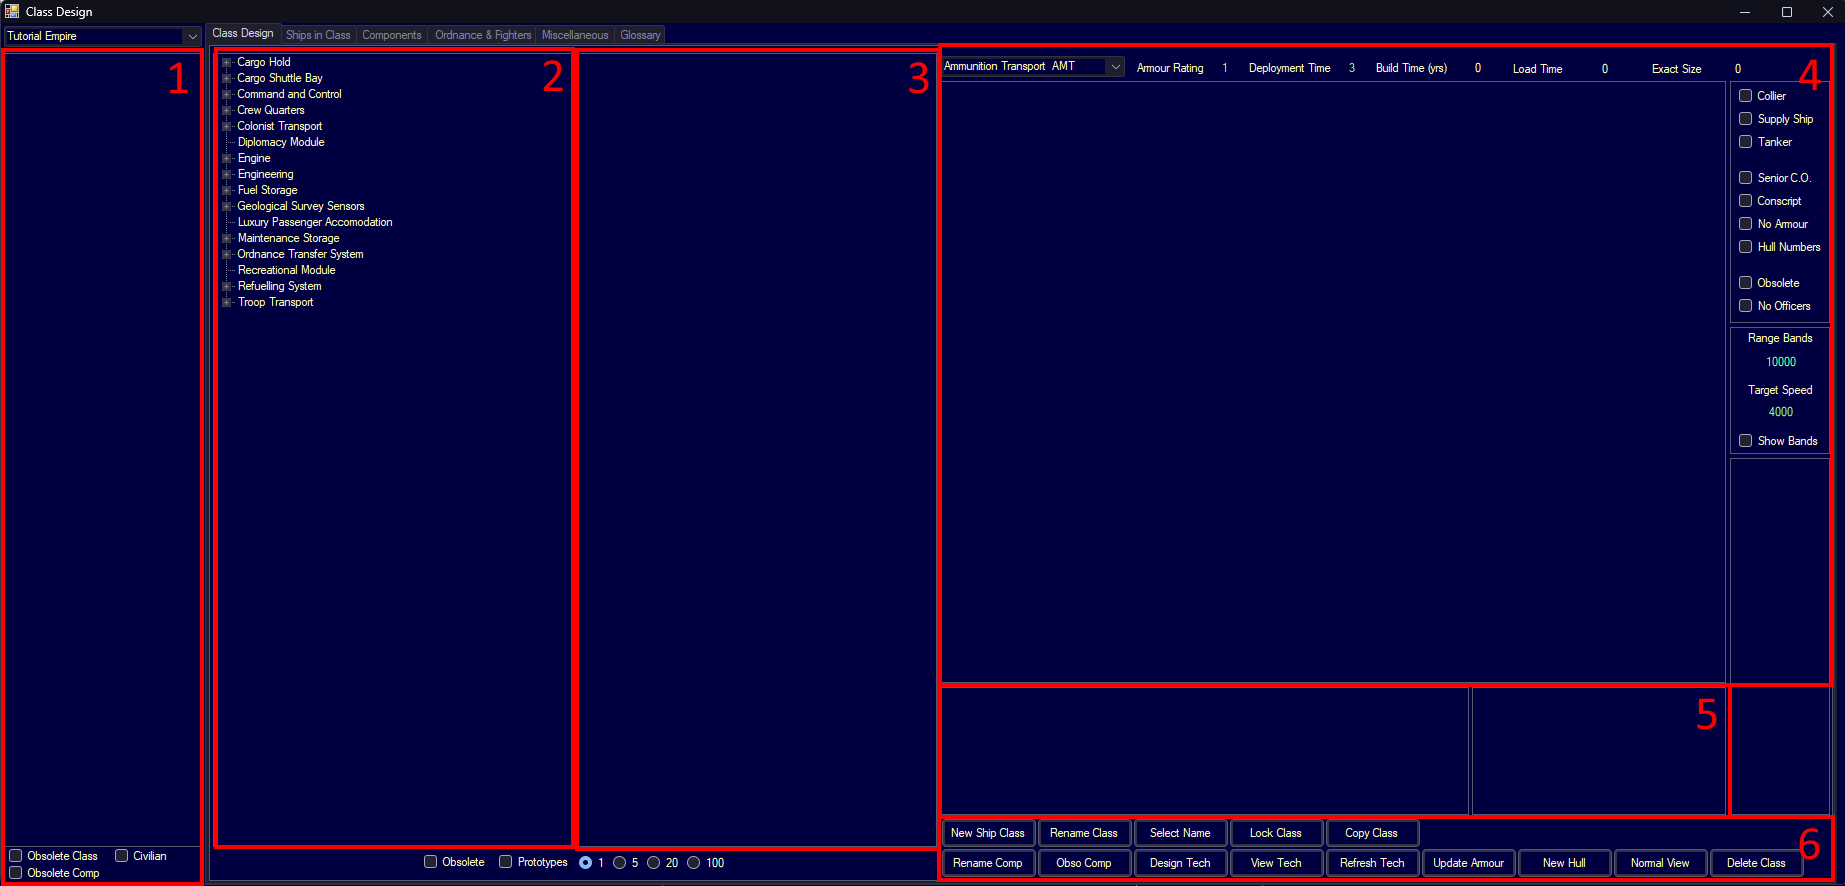 Image of wide view and sections within it.
Creating a Ship
To start, click on New Ship Class.
- After clicking that you can also press Rename Class to type in a name for your class or Select Name to choose a name that follows your naming scheme (or any other name the game has by default).
 Image of new ship class button.
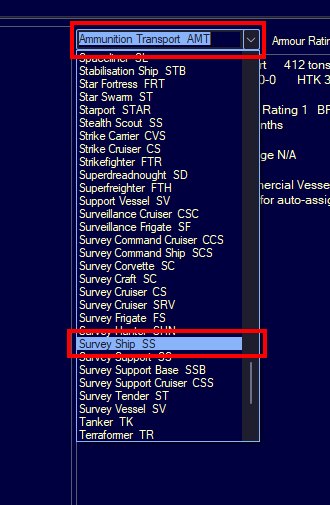
Now, you’ll want to click the drop down at the top and select Survey Ship.
- This drop down is just for choosing a cosmetic prefix for you ship (displayed right before the name), you don’t need to use Survey Ship if you don’t want to.
You can also create your own ship type by pressing New Hull in the bottom right.
Engines and Sensors
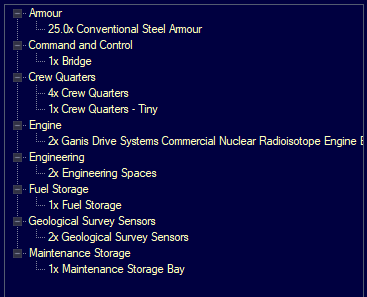
Now, we’re going to begin designing our ship. First you’ll want to add at least one engine (the one you created in part 3 of the tutorial) and one Geological Survey Sensor. I added two of each.
In the component list you can double click to add it to your ship. In the component list for your ship, you can double click to remove a component.
After adding them, they should appear in the column to the right, as well as the text block to the right of that.
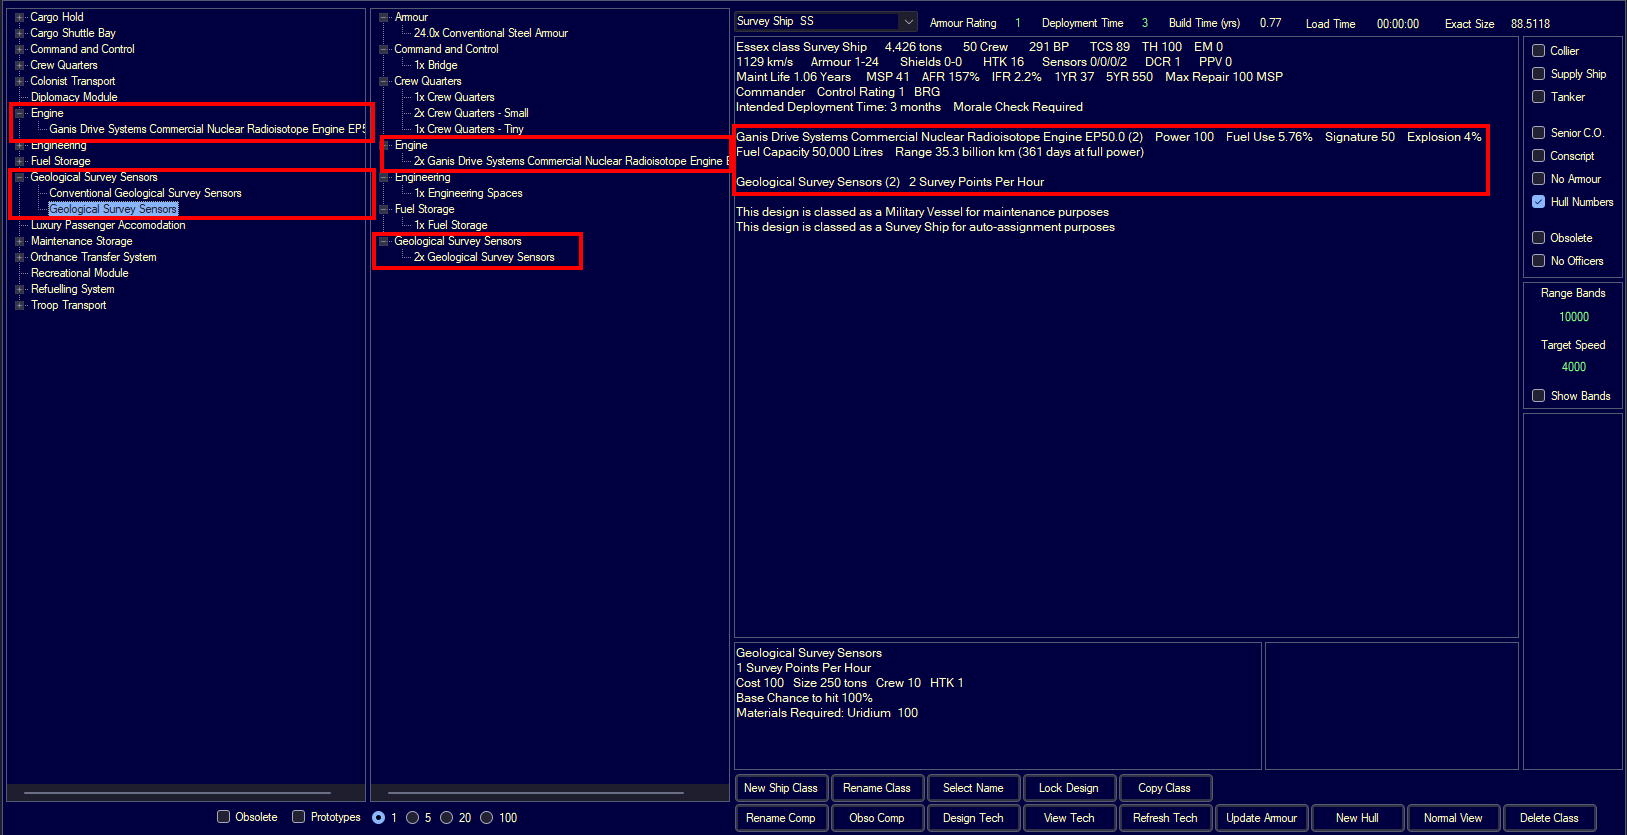 Image of adding engine and sensors to ship.
Deployment Time
Then, we’ll adjust the deployment time. Survey ships generally spend a long time away from any colonies since they are discovering new locations so a longer deployment time makes sense. This will effect some stats about the crew that you can see right below it, but I’m not going to explain all the effects here. Just know that you should set a reasonable deployment time for all your ships otherwise morale will be effected.
I set my deployment time to 48 months.
Maintenance
Next, you want to locate the line pictured. This line displays information about maintenance.
- The biggest thing to note is that our Maintenance Life (shortened to Maint Life) is only 1.05 years. If we’re planning to have crew onboard for 4 years, having such a short maintenance life is problematic.
- The next thing to note, is our MSP or maintenance supplies. Currently, we have 42, but if you take a look at the Max Repair (the amount of supplies needed to repair our largest component), it reads 100 MSP.
To remedy those problems, let’s add some more components.
You’ll want to add:
- A second Engineering Spaces. This increases our Maint Life.
- A Maintenance Storage Bay. This increases our MSP.
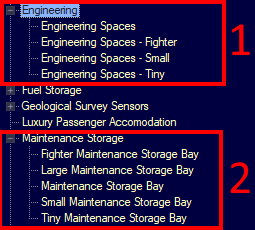 Image of adding maintenance things.
Then, they should appear in your component list.
Now if you take a look at the line with maintenance information, you’ll see a few changes.
- Our Maint Life is longer than our deployment time—perfect.
- Our MSP exceeds the 5YR value, which is the expected MSP needed for five years of maintenance—perfect.
If yours doesn’t yet exceed those, add more Engineering Spaces and Maintenance Storage Bays.
Fuel
Next up, let’s take a look at this line. Our Fuel Capacity. You’ll want to pay attention to the Range. Right now, mine displays 33.2 billion km.
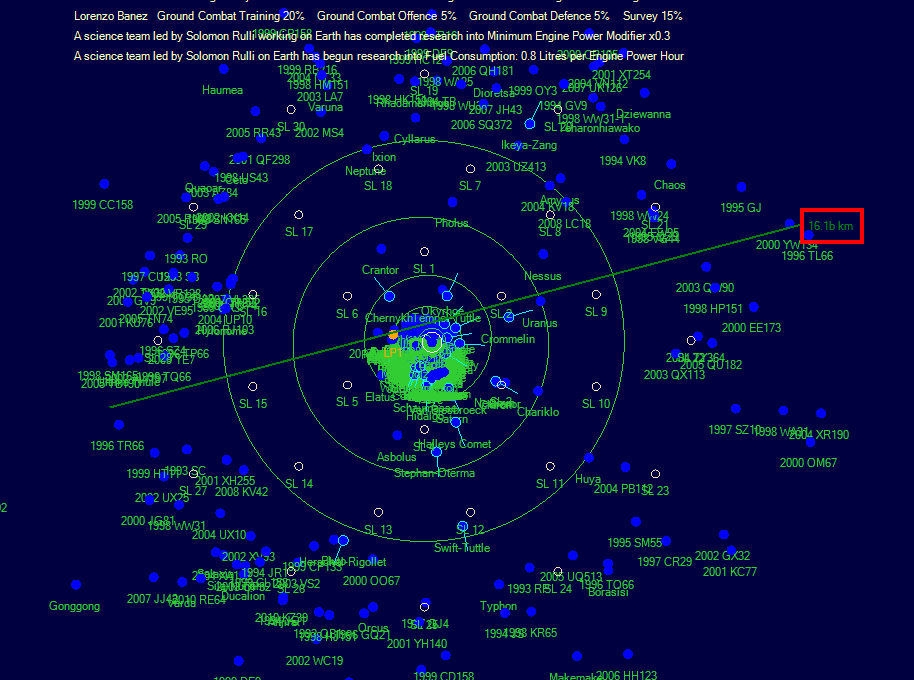
While this may seem like a lot, and it is considering crossing the solar system only requires about 16 billion km, there are a few bodies floating much further, and you wouldn’t want your ship coming back to Earth to refuel every few surveys.
You can hold shift and drag on the main screen to display a ruler.
Let’s increase our fuel capacity. Remove your current Fuel Storage and replace it with Fuel Storage - Large, if you haven’t researched large fuel storage, just add one or two more normal sized fuel storages.
Now, take another look at our fuel stats.
157.8 billiom km should definitely be enough.
Finishing Up
You’ll want to lock your design, the game will auto lock it once construction begins, but it’s good practice to lock it yourself to keep track incase you’re designing multiple ships at once.
While you’re learning, if you make a mistake you can activate SM (Space Master) mode by hitting the button to the left of auto turns. Then you can unlock your design and fix your mistakes.
Now, head back to the Shipyards tab in the economics window.
Here, you’ll want to select your type N shipyard because the survey ship is classified as a military ship (we’ll talk about ship classifications later).
Then, if you have any active activity, delete it.
Finally, select Retool in the drop down, then make sure your ship is selected to the right of that, and press Set Activity. This will allow the shipyard to produce your ship.
Then, you’ll want to go to the lower section.
Here, we’re going to:
- Set the task type to Construction since we’re going to construct a ship.
- The Fleet doesn’t matter, we’ll be creating our own fleets rather than using the default ones.
- For Class make sure the ship you just made is selected.
- And set the Ship Name to whatever you would like.
- Alternatively you can press Select Name to choose a name from the names lists.
- Then press Create Task to queue it up.
You’ll notice that you can’t see your ship in the main shipyards queue. This is because they are stored on a different tab. Click on Shipyard Tasks and you should see your tasks listed.
With that, you have queued up your first ships. Next time, we’ll begin surveying our system, locating places to mine for more resources.
Lastly, don’t forget to save!
Part 5 is available available here!
